2D Parallax
Introduction
Parallax is an effect used to simulate depth by having textures move at different speeds relative to the camera. Blazium provides the Parallax2D node to achieve this effect. It can still be easy to get tripped up though, so this page provides in-depth descriptions of some properties and how to fix some common mistakes.
Note
This page covers how to use Parallax2D, which is recommended to use over the ParallaxLayer and ParallaxBackground nodes.
Getting started
The parallax node supports adding nodes that render things as children, so you can use one or many nodes to make up each
layer. To begin, place each node or nodes you want to have scroll independently as a child of their own parallax node.
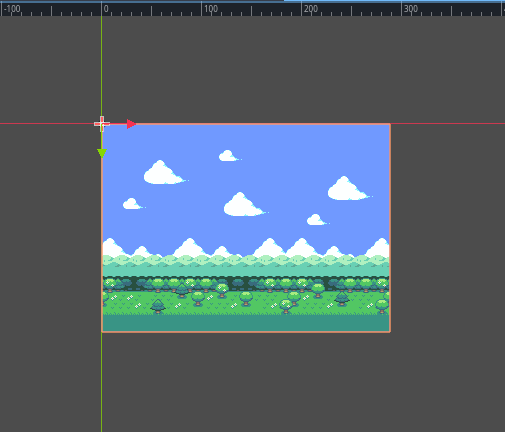
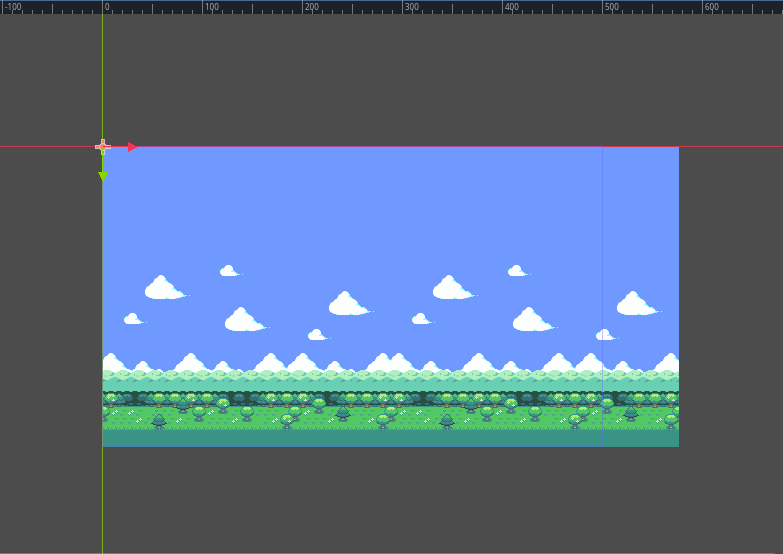
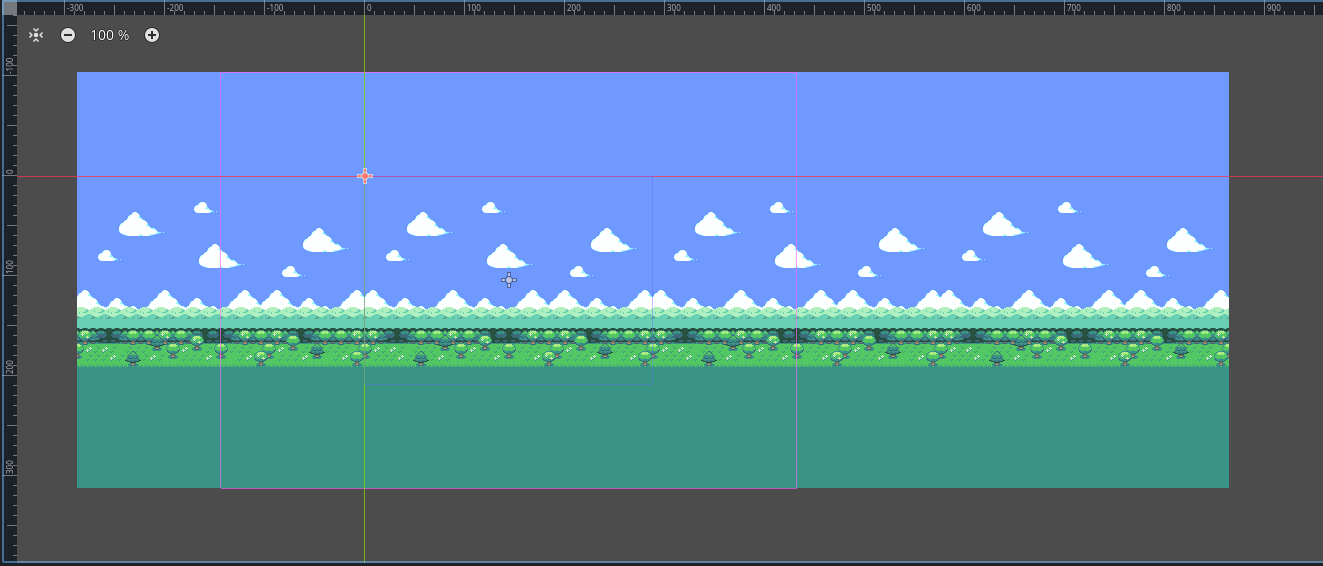
Make sure that the top left of the textures used are at the (0, 0) crossing, like in the image below. See the section
on positioning for why this is important.
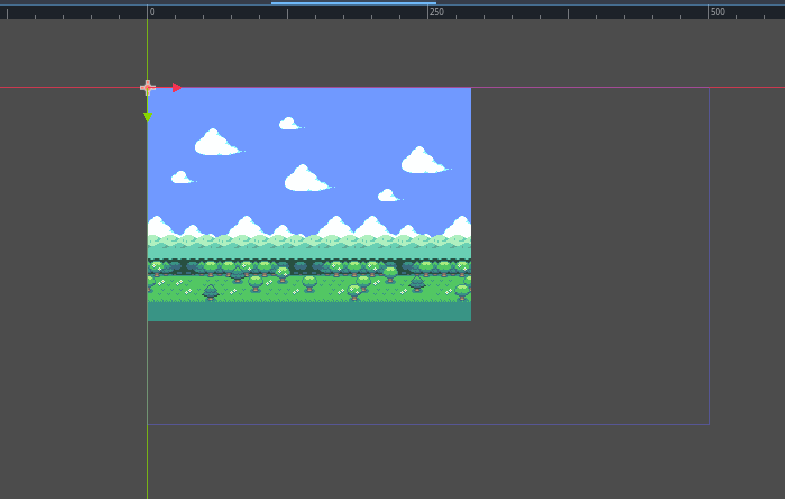
The scene above uses one prepared texture for the higher clouds in a Sprite2D, but you could just as easily use multiple nodes spaced out to compose the layer.
Scroll scale
The backbone of the parallax effect is the scroll_scale property. It works as a scroll-speed multiplier, allowing layers to move at a different speed than the camera for each axis set. A value of 1 makes the parallax node scroll at the same speed as the camera. If you want your image to look further away when scrolling, use a value lower than 1, with 0 bringing it to a complete stop. If you want something to appear closer to the camera, use a value higher than 1, making it scroll faster.
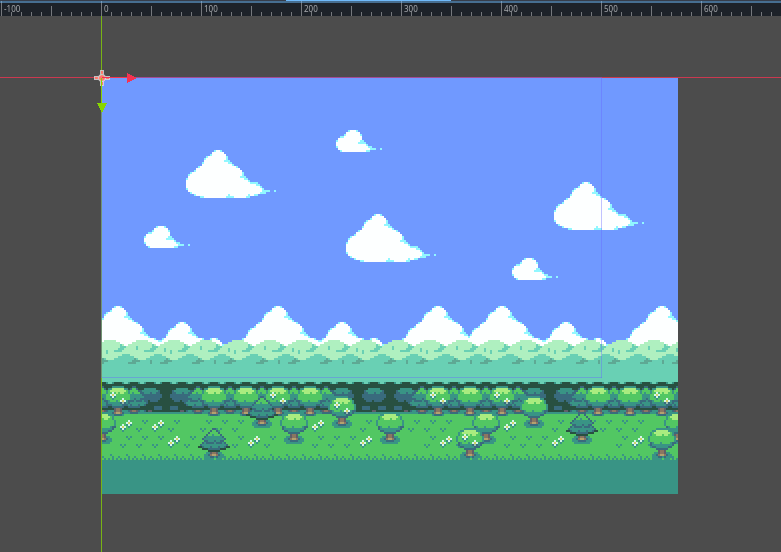
The scene above is comprised of five layers. Some good scroll_scale values might be:
(0.7, 1)- Forest(0.5, 1)- Hills(0.3, 1)- Lower Clouds(0.2, 1)- Higher Clouds(0.1, 1)- Sky
The video below displays how these values affect scrolling while in-game:
Infinite repeat
Parallax2D provides a bonus effect that gives textures the illusion of repeating infinitely. repeat_size tells the node to snap its position forward or back when the camera scrolls by the set value. This effect is achieved by adding a single repeat to all the child canvas items offset by the value. While the camera scrolls between the image and its repeat, it invisibly snaps back giving the appearance of a looping image.
Being a delicate effect, it's easy for unfamiliar users to make mistakes with their setup. Let's go over the "how" and "why" of a few common problems users encounter.
Poor sizing
The infinite repeat effect is easiest to work with when you have an image designed to repeat seamlessly and is the same size or larger than your viewport before setting the repeat_size. If you aren't able to obtain assets that are designed for this task, there are some other things you can do to better prepare your image in regards to size.
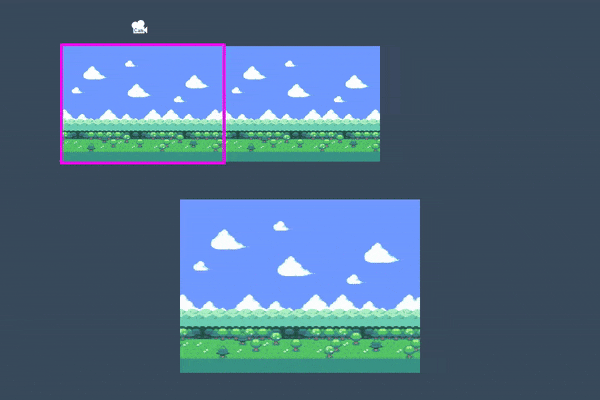
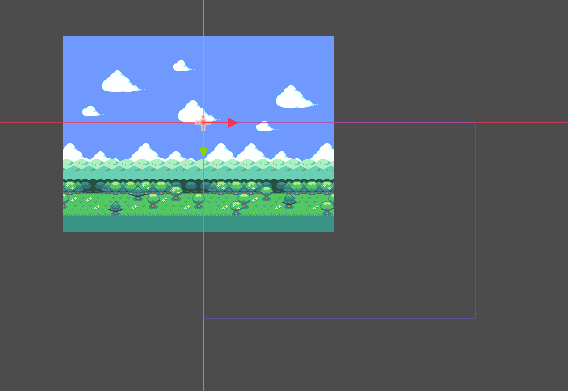
Here is an example of a texture that is too small for its viewport:
We can see that the viewport size is 500x300 but the texture is 288x208. If we set the repeat_size to the size of our image, the infinite repeat effect doesn't scroll properly because the original texture doesn't cover the viewport. If we set the repeat_size to the size of the viewport, we have a large gap. What can we do?
Make the viewport smaller
The simplest answer is to make the viewport the same size or smaller than your textures. In Project Settings > Display > Window, change the Viewport Width and Viewport Height settings to match your background.
Scale the Parallax2D
If you're not aiming for a pixel-perfect style, or don't mind a little blurriness, you may opt to scale the textures larger to fit your screen. Set the scale of the Parallax2D, and all child textures scale with it.
Scale the child nodes
Similar to scaling the Parallax2D, you can scale your Sprite2D nodes to be large enough to cover the screen. Keep in mind that some settings like Parallax2D.repeat_size and Sprite2D.region_rect do not take scaling into account, so it's necessary to adjust these values based on the scale.
Repeat the textures
You can also start off on the right foot by preparing child nodes earlier in the process. If you have a Sprite2D you'd like to repeat, but is too small, you can do the following to repeat it:
set region_enabled to
trueset the region_rect to a multiple of the size of your texture large enough to cover the viewport.
Below, you can see that repeating the image twice makes it large enough to cover the screen.
Poor positioning
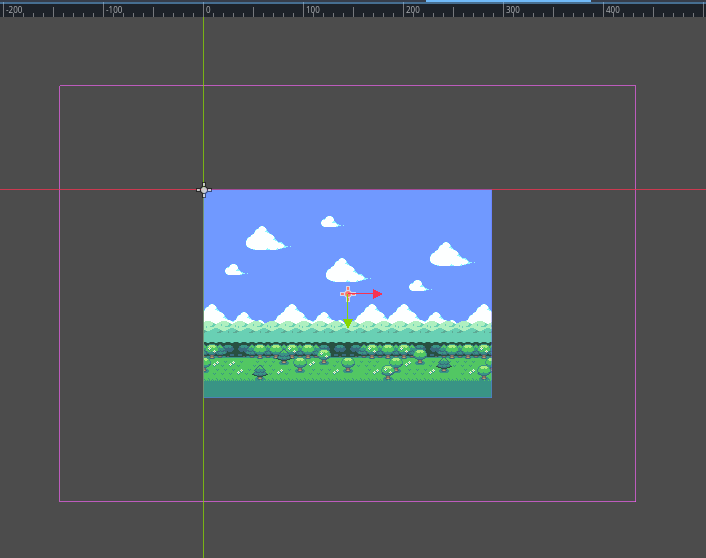
It's common to see users mistakenly set all of their textures to be centered at (0,0):
This creates problems with the infinite repeat effect and should be avoided. The "infinite repeat canvas" starts at
(0,0) and expands down and to the right to the size of the repeat_size
value.
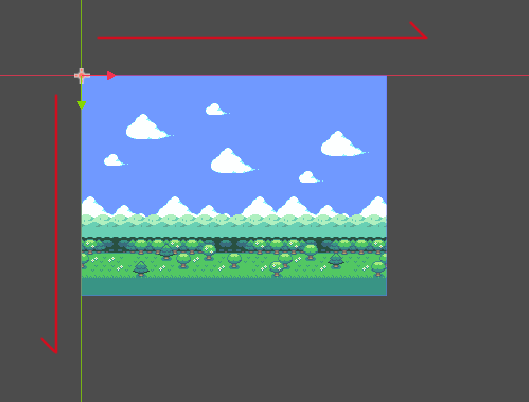
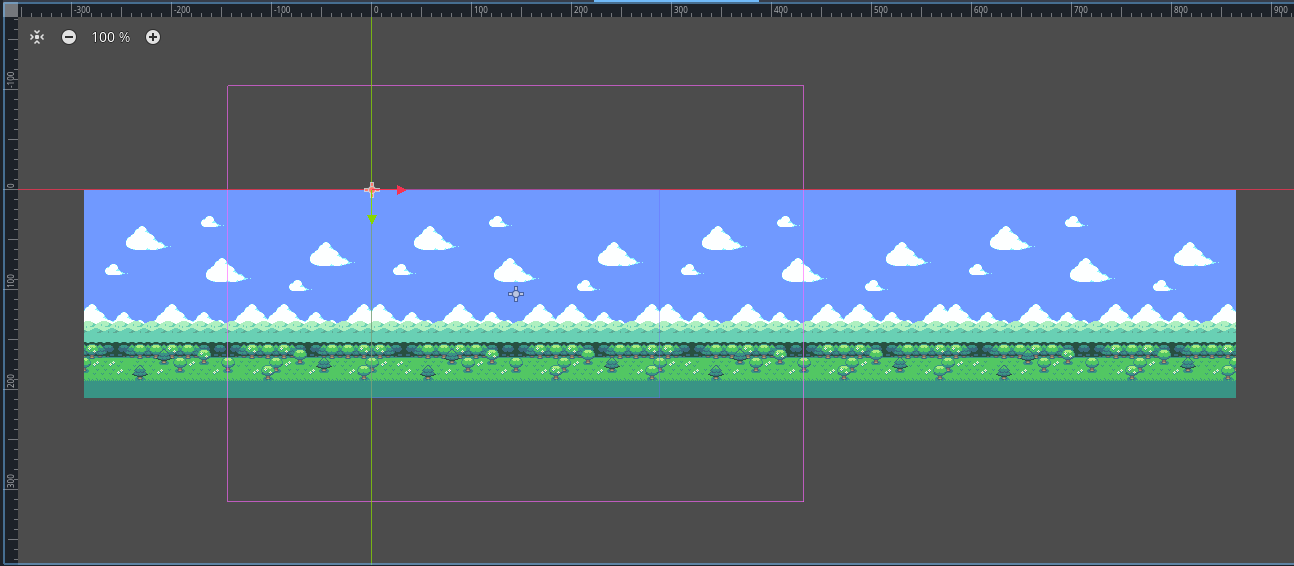
If the textures are centered on the (0,0) crossing, the infinite repeat canvas is only partly covered, so it
only partly repeats.
Would increasing repeat_times fix this?
Increasing repeat_times technically would work in some scenarios, but is a brute force solution and not the problem it is designed to solve (we'll go over this in a bit). A better fix is to understand how the repeat effect works and set up the parallax textures appropriately to begin with.
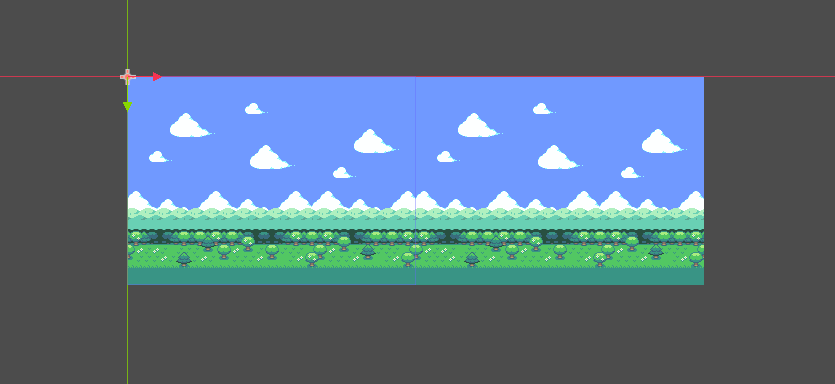
First, check to see if any textures are spilling over onto the negative parts of the canvas. Make sure the textures
used in the parallax nodes fit inside the "infinite repeat canvas" starting at (0,0). That way, if
Parallax2D.repeat_size is set correctly, it should look something like
this, with one single loop of the image the same size or larger than the viewport:
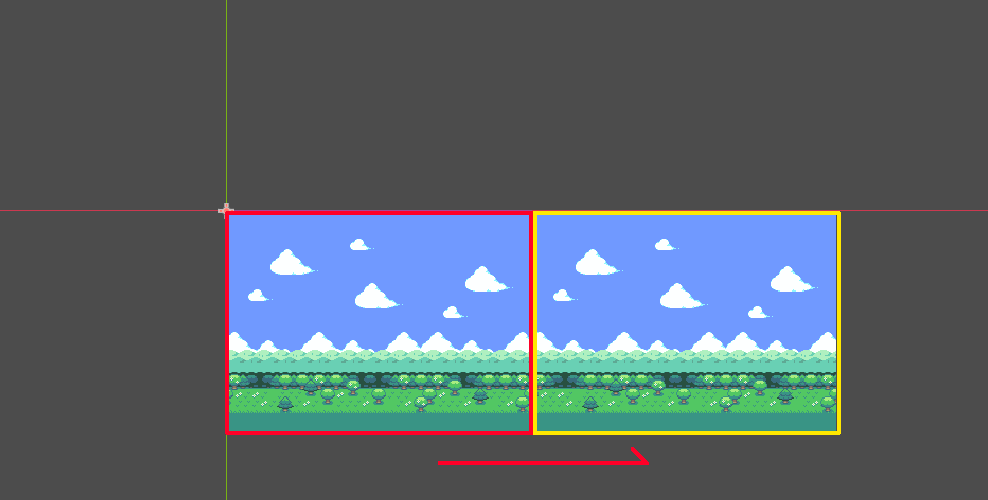
If you think of how the image scrolls across the screen, it starts by displaying what's inside the red rectangle (determined by repeat_size), and when it reaches what's inside the yellow rectangle it zips the image forward to give the illusion of scrolling forever.
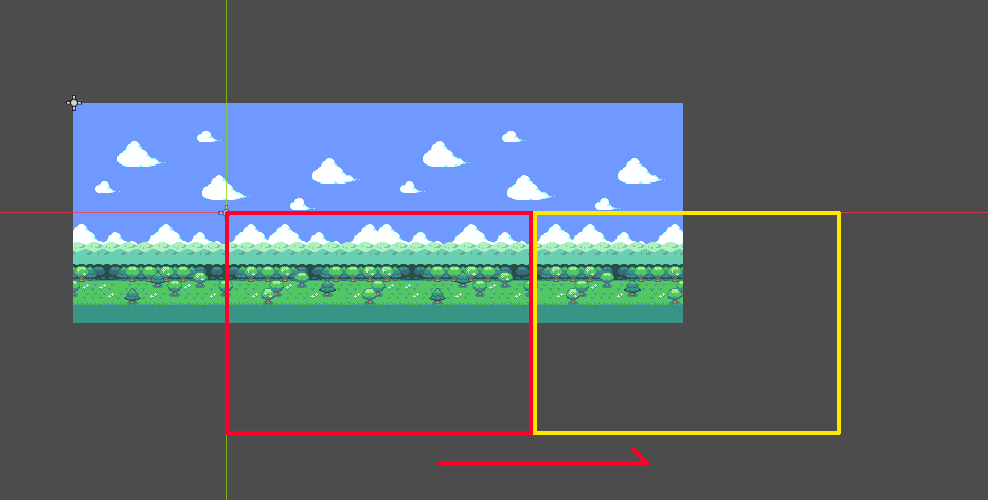
If you have the image positioned away from the "infinite repeat canvas", when the camera reaches the yellow rectangle, half of the image is cut off before it jumps forward like in the image below:
Scroll offset
If your parallax textures are already working correctly, but you prefer it to start at a different point,
Parallax2D comes with a scroll_offset property
used to offset where the infinite repeat canvas starts. As an example, if your image is 288x208, setting
the scroll_offset to (-144,0) or (144,0) allows it to begin
halfway across the image.
Repeat times
Ideally, following this guide, your parallax textures are large enough to cover the screen even when zoomed out.
Until now, we have had a perfectly fitting 288x208 texture inside of a 288x208 viewport. However, problems
occur when we zoom out by setting the Camera2D.zoom to (0.5, 0.5):
Even though everything is correctly set for the viewport at the default zoom level, zooming out makes it smaller than
the viewport, breaking the infinite repeat effect. This is where
repeat_times can help out. Setting a value of 3 (one extra
repeat behind and in front), it is now large enough to accommodate the infinite repeat effect.
If these textures were meant to be repeated vertically, we would have specified a y value for the
repeat_size. The
repeat_times would automatically add a repeat above and below as well.
This is only a horizontal parallax, so it leaves an empty block above and below the image. How do we solve this? We
need to get creative! In this example, we stretch the sky higher, and grass sprite lower. The textures now support the
normal zoom level and zooming out to half size.
Split screen
Most tutorials for making a split screen game in Blazium begin by writing a small script to assign the Viewport.world_2d of the first SubViewport to the second, so they have a shared display. Questions often pop up about how to share a parallax effect between both screens.
The parallax effect fakes a perspective by moving the positions of different textures in relation to the camera. This is understandably problematic if you have multiple cameras, because your textures can't be in two places at once!
This is still achievable by cloning the parallax nodes into the second (or third or fourth) SubViewport. Here's how a setup looks for a two player game:
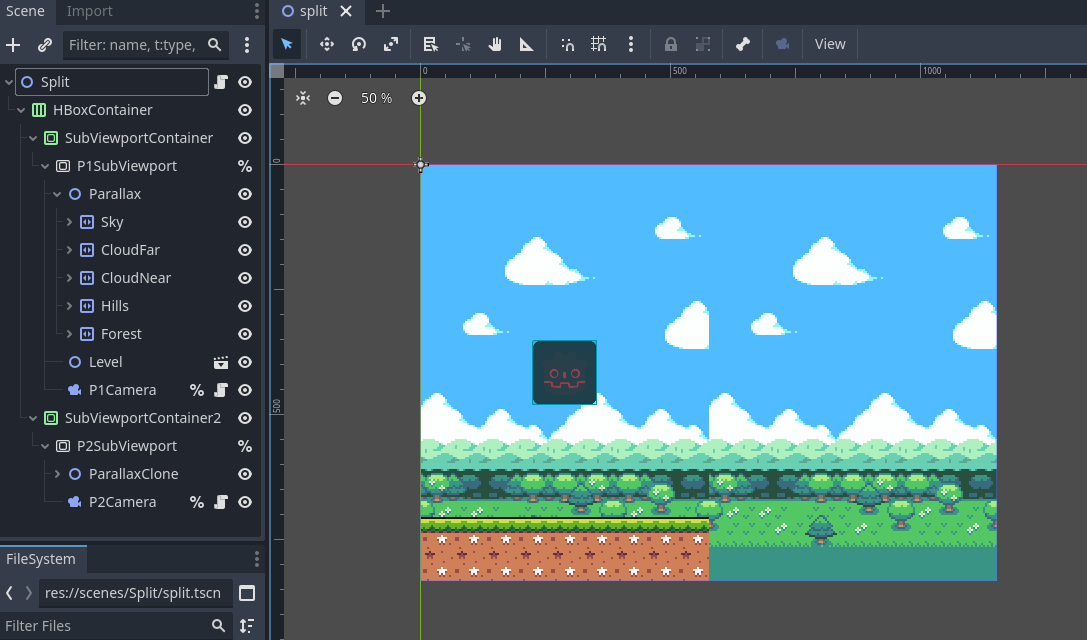
Of course, now both backgrounds show in both SubViewports. What we want is for each parallax to only show in their corresponding viewport. We can achieve this by doing the following:
Leave all parallax nodes at their default visibility_layer of 1.
Set the first SubViewport's canvas_cull_mask to only layers 1 and 2.
Do the same for the second SubViewport but use layers 1 and 3.
Give your parallax nodes in the first SubViewport a common parent and set its visibility_layer to 2.
Do the same for the second SubViewport's parallax nodes, but use a layer of 3.
How does this work? If a canvas item has a visibility_layer that doesn't match the SubViewport's canvas_cull_mask, it will hide all children, even if they do. We use this to our advantage, letting the SubViewports cut off rendering of parallax nodes whose parent doesn't have a supported visibility_layer.
Previewing in the editor
Prior to 4.3, the recommendation was to place every layer in their own ParallaxBackground, enable the follow_viewport_enabled property, and scale the individual layer. This method has always been tricky to get right, but is still achievable by using a CanvasLayer instead of a ParallaxBackground.
Note
Another recommendation is KoBeWi's "Parallax2D Preview" addon. It provides a few different preview modes and is very handy!